It is my day on the Scrap Busting Blog Hop. I am going to help you bust your scraps with this scrappy four patch quilt.
This is an easy project for all skill levels and is sure to bust a good amount of scraps in your stash. You all need is light/neutral fabrics and medium/dark fabrics for this project.
I am the only blogger sharing a project this week. You can visit Melissa’s blog for the full schedule of past and future scrappy projects.ost A big thank you to Melissa for hosting us. I hope you enjoy my project.
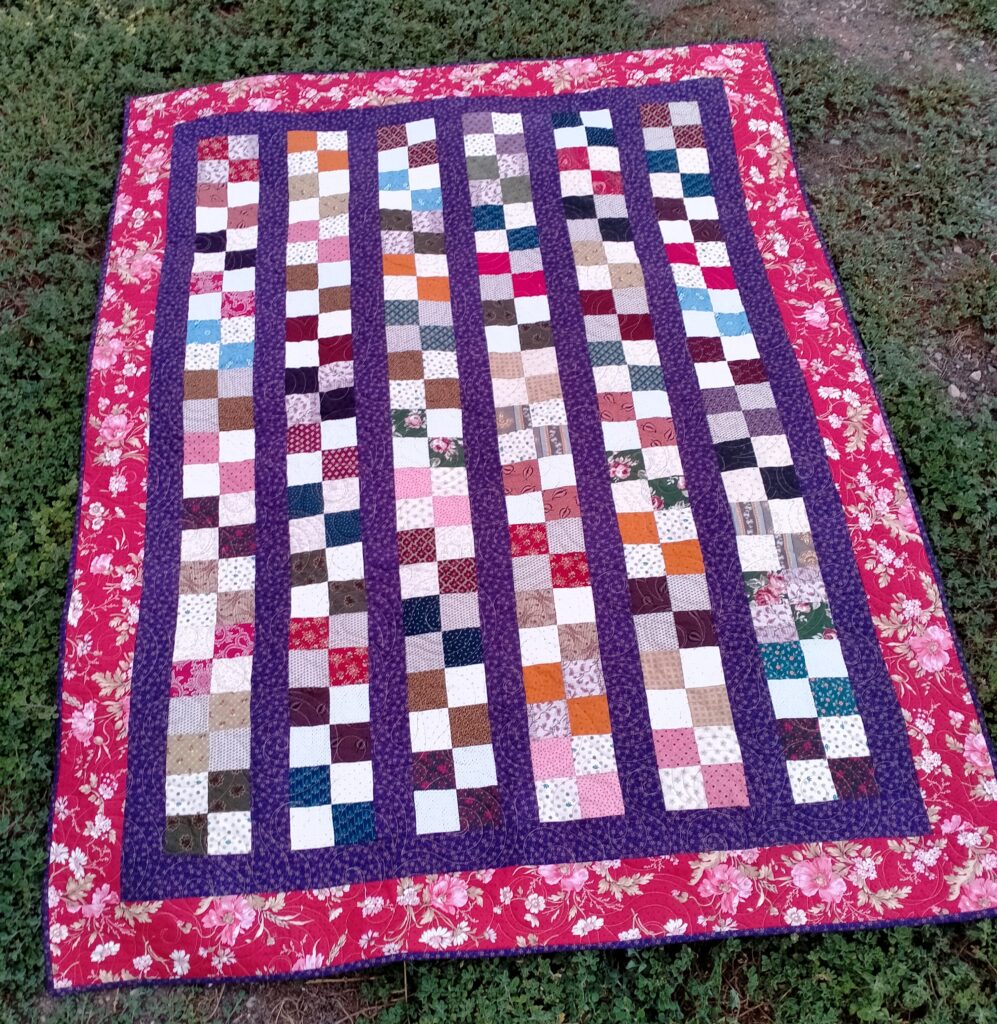
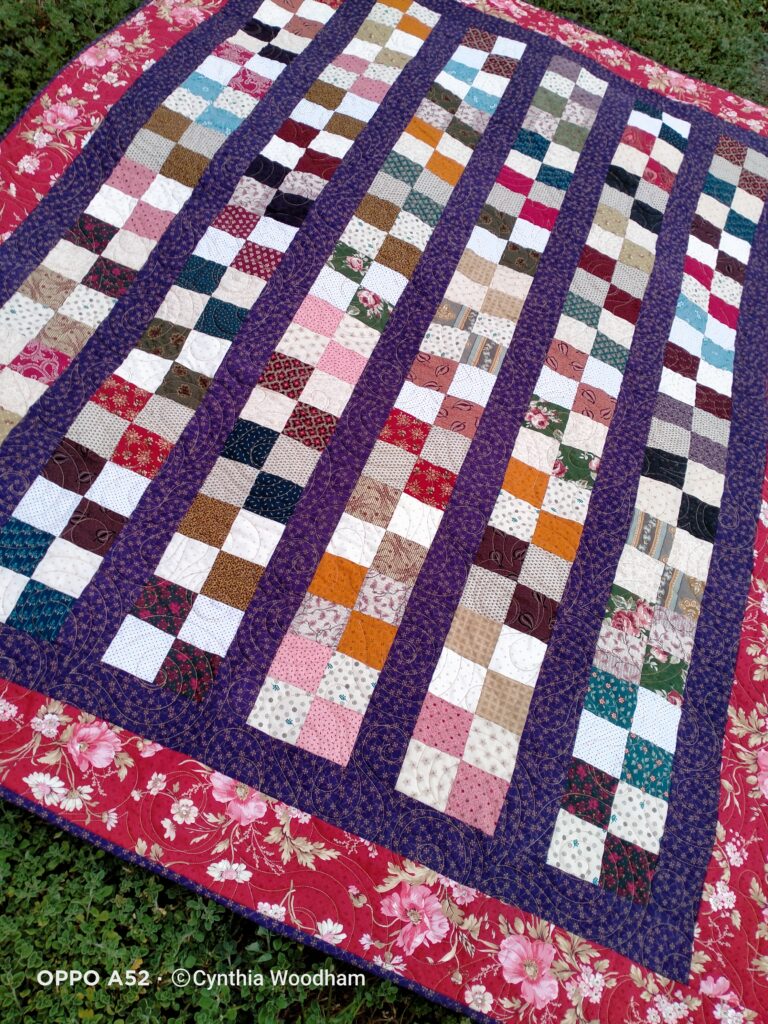
Cynthia’s Scrappy Four Patch Quilt
Materials
85cm of assorted light/neutrals fabrics (approx.) or 144 x 3” squares
85cm of assorted medium/dark fabrics (approx.) or 144 x 3” squares
110 cm fabric for sashing and first border
90cm fabric for 2nd border
50cm fabric for binding
Note: A ¼” seam is used throughout this project.
Instructions
- To make the Four Patch pair a light and dark square right sided together and sew together. Repeat with a second pair. Press seams to the darker one.
- Making sure colours are diagonally opposite each other pair them right sides together and sew your Four Patch together. Press. I like to spin my seams to keep the bulk down in the centre of my blocks or you could press all your seams open. I do recommend if you are going to press your seams open make sure you reduce your stitch length to around 1.8.
- Then repeat Steps 1-2 to make 72 Four Patch blocks
- Sew your blocks into rows of 12. Make sure all your blocks are facing the same way. You don’t want to have two colours or neutral squares next to each other. Press seams one way or open.
- Cut 14 x 3” strips from your sashing fabric. Sew three strips together lengthwise. Measure your block strip to work out the length you need to cut. Fold your sashing strip set in half and cut to your measurement. This gives you 2 sashing strips at a time. Repeat 4 more times. Note: on the last strip set cut only 1 sashing strip as you only need 7 across to join your block rows.
- Sew your sashing strips on to right sided your blocks strips. Press to the sashing strip.
- Sew them all together and press to the sashing strip.
- The last sashing strip is sewn the left-hand side of your Block/sashing strip set. Press to the sashing.
- Measure across your sashed blocks for your top and bottom sashing border and you should be able to get 1 out of the left over from the above step.
- Sew the last two sashing strips together lengthways and cut you last sashing strip.
- Sew the top and bottom sashing borders on. Pressing towards the sashing.
- Measure through the middle of your quilt -top to bottom to get that length of your side border strips.
- Cut 7 x 5” strips form your border fabric and sew 2 sets of two strip together along the short side to give you 2 x 80+ long strips. Cut your 2 side borders from these 2.
- Sew the borders to the sides of your quilt. Press outwards.
- Measure through the centre of your quilt left to right this time for your top and bottom border.
- Sew the remaining 3 border strips together. Fold in half and cut your top and bottom borders.
- Sew to the top and bottom of your quilt. Press outwards.
- This completes your quilt top. It is an easy pattern to enlarge or reduce if you like.
- Baste your quilt using you preferred method and quilt it as desired. Stitching in the ditch or zigzag through the blocks would work or you could get creative with some rulerwork (eg Spinefex templates)
- For binding Cut 7 x 2 ½” strips, join the strips end to end with a mitred seam, pressing seams open. Press strip in half lengthwise wrong side together. Stitch the binding to the front of the quilt, mitring the corners as you go and mitring the join to complete the binding. Trim the backing and batting to ½” from the binding stitch line. Fold the binding over the edge of your quilt to the back and stitch to the backing with a matching thread.
- This quilt was designed by Cynthia Woodham for Cynthia’s Ark. This pattern is for personal use only, not to be copied in any form unless you have permission from Cynthia Woodham. Copyright © Cynthia’s Ark 2021
Until Next Time Keep Stitching
Cynthia
No responses yet